Latest Blog Posts


Top rated

Product Menu and How to Manage Products?
Log in to your Trademart vendor account and open "Vendor Panel".

Product Menu:
Step 1:
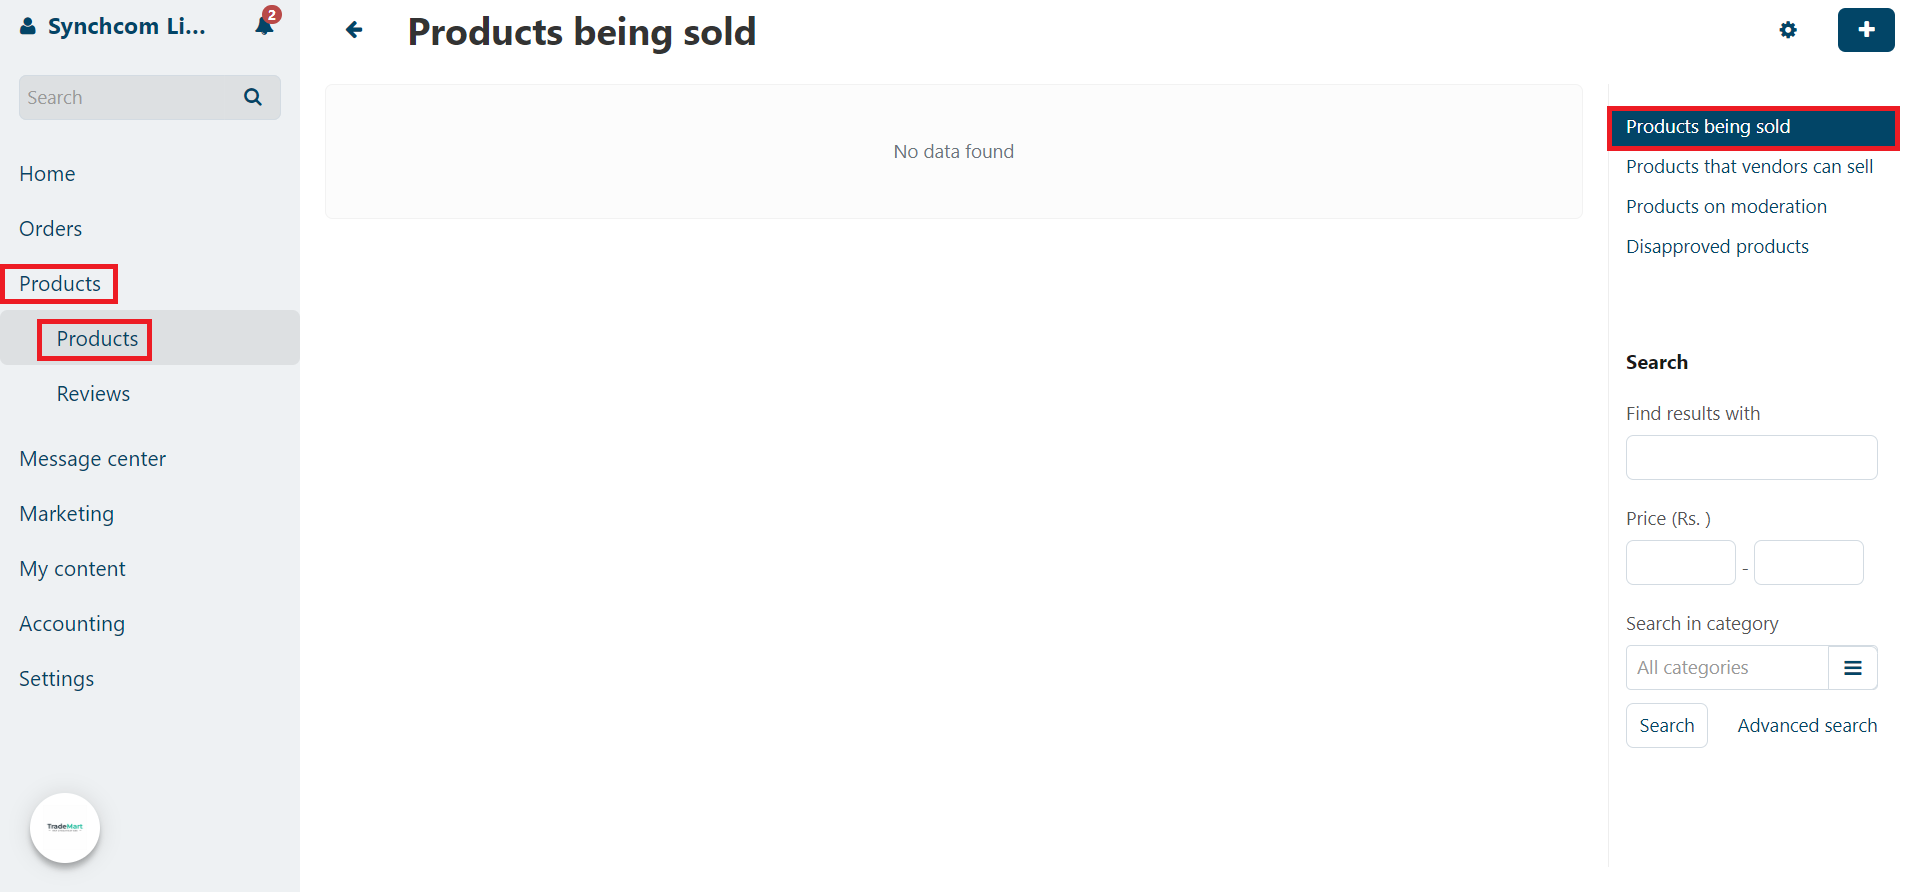
Go to Products → Products in the administration panel of your store, then click the + button in the upper right part of the page
- Select "Products being sold" from the tabs on the right-hand side. This will show a list of all the products that a vendor has sold.
At the start, there will be no product unless you had uploaded any product on your store and that had been sold to the customers.
Step 2:
- Click on the next tab "Products that vendors can sell". It will show a list of all products that a vendors can sell at their store.

Step 3:
- Click on the next tab "Products on Moderation". It will show a list of all the products that the vendor has uploaded to the store but have not been approved by the admin.

Step 4:
- Click on the "Disapproved products" tab. It will show all the products that have been disapproved by the admin due to non-compliance with the Trademart's rules and regulations for uploading the products.

Add New Product:
Step 1:
- Go to Products → Products in the administration panel of your store, then click the + button in the upper right part of the page
- Click on the "products being sold" tab. Then click on the plus icon in the top right corner of your screen and select create a new product.

Step 2:
The product creation page will open. With different tabs just below the heading of "New product“, fill the required fields of the product.

Step 3:
General Tab:
1. Information:
- Name—the name of the product as it appears on the storefront and in the Administration panel.
- Categories—the categories that the product will be assigned to.
- Price—Sale product price
- Full description—the product description that will appear on the product details page of the storefront.
- Images—the images of the product. Supported formats are JPEG, GIF, and PNG. The maximum size of an uploaded image should not exceed 2 MB.

General Tab:
2. Pricing / Inventory:
- CODE—the identifier of the product that you use in your store (a stock keeping unit or SKU); it is used to distinguish products from each other during import, so that the data would be saved to the right product.
- List price—if this price is higher than product’s Price, then a discount label will be displayed for the product.
- In stock—the number of products in the stock.
- Taxes—select the taxes that will be applied to the product.

General Tab:
3. Extra:
- Short description—a short product description; it appears on the product list on the storefront. If you leave this field blank, the short description will be automatically taken from the full product description (first 300 characters).
- Then Click on the "Create"

Step 4:
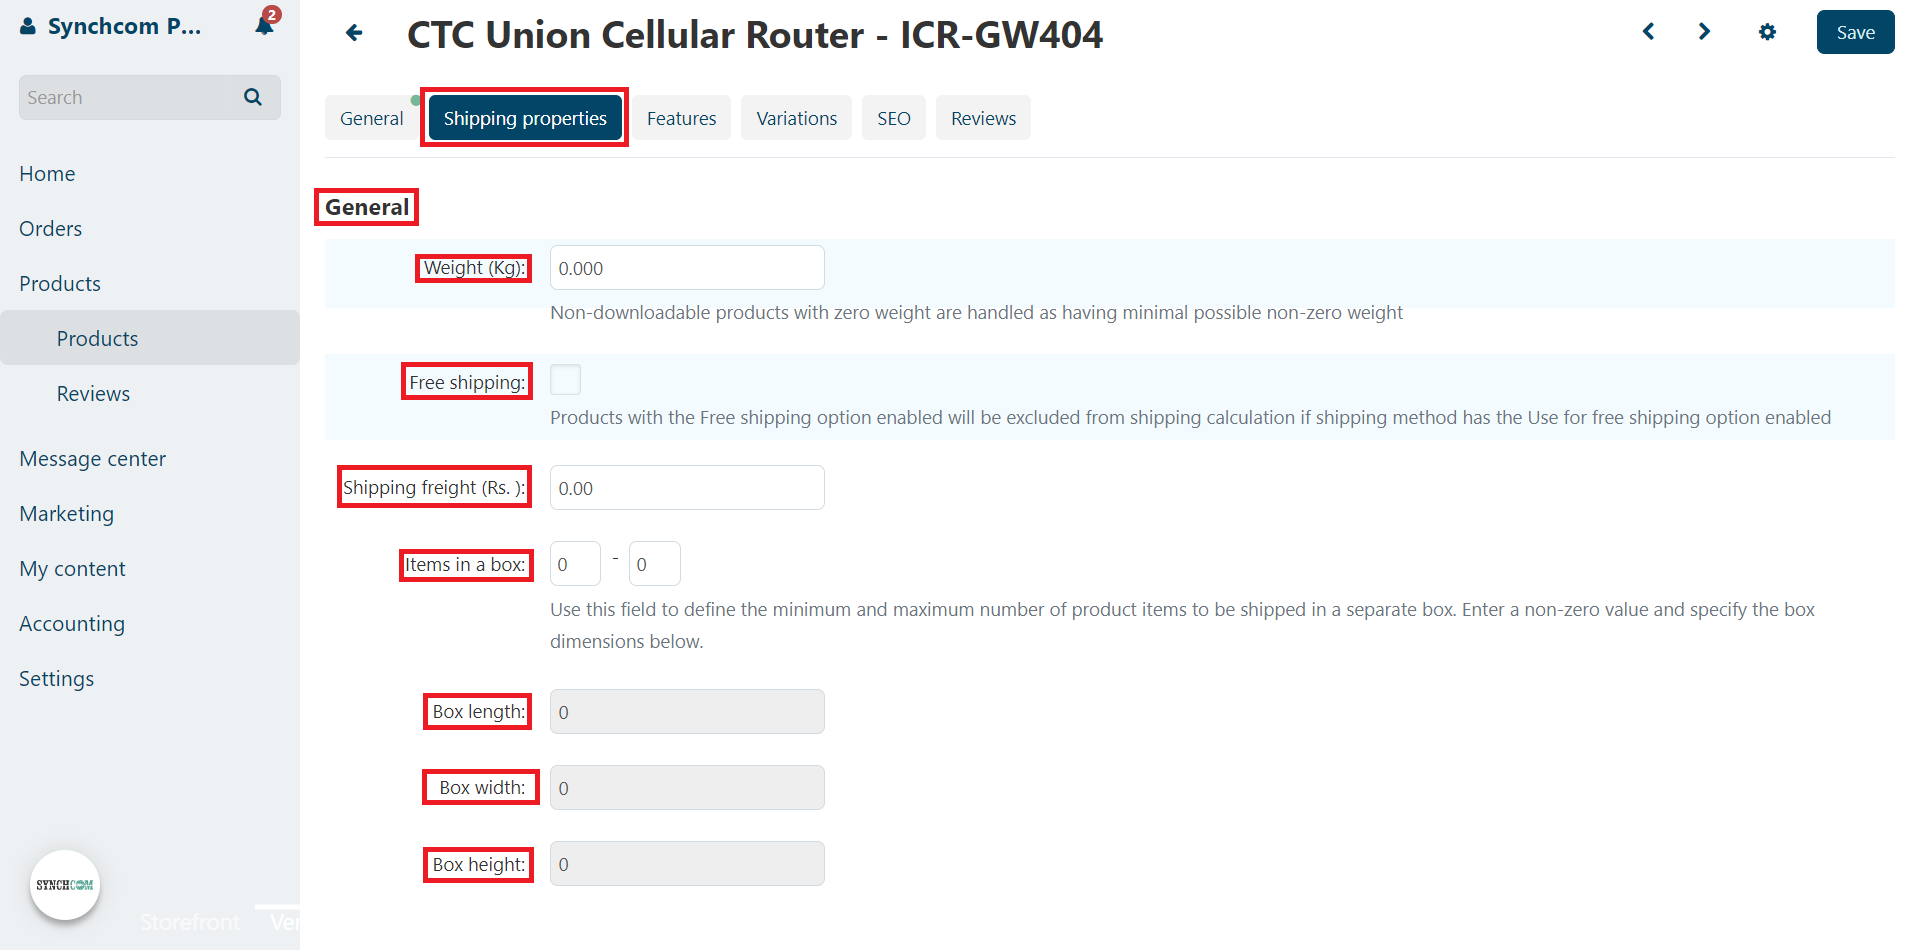
- Once the product has been created in the store then few additional tabs will appear below the name of the product as shown in the image.

Step 5:
Shipping Properties Tab:
General:
- Weight—the weight of a single item in the store’s default weight measurement unit.
- Free shipping—if you tick this checkbox, the product will be excluded from the shipping cost calculation.
- Shipping freight—the handling fee (insurance, packaging, etc.) added to the shipping cost.
- Items in a box—the min. and max. No. of product items to be shipped in a separate box. Usually it’s 1 - 1 (only one product per box).
- Box length—the length of a separate box.
- Box width—the width of a separate box.
- Box height—the height of a separate box.
Step 6:
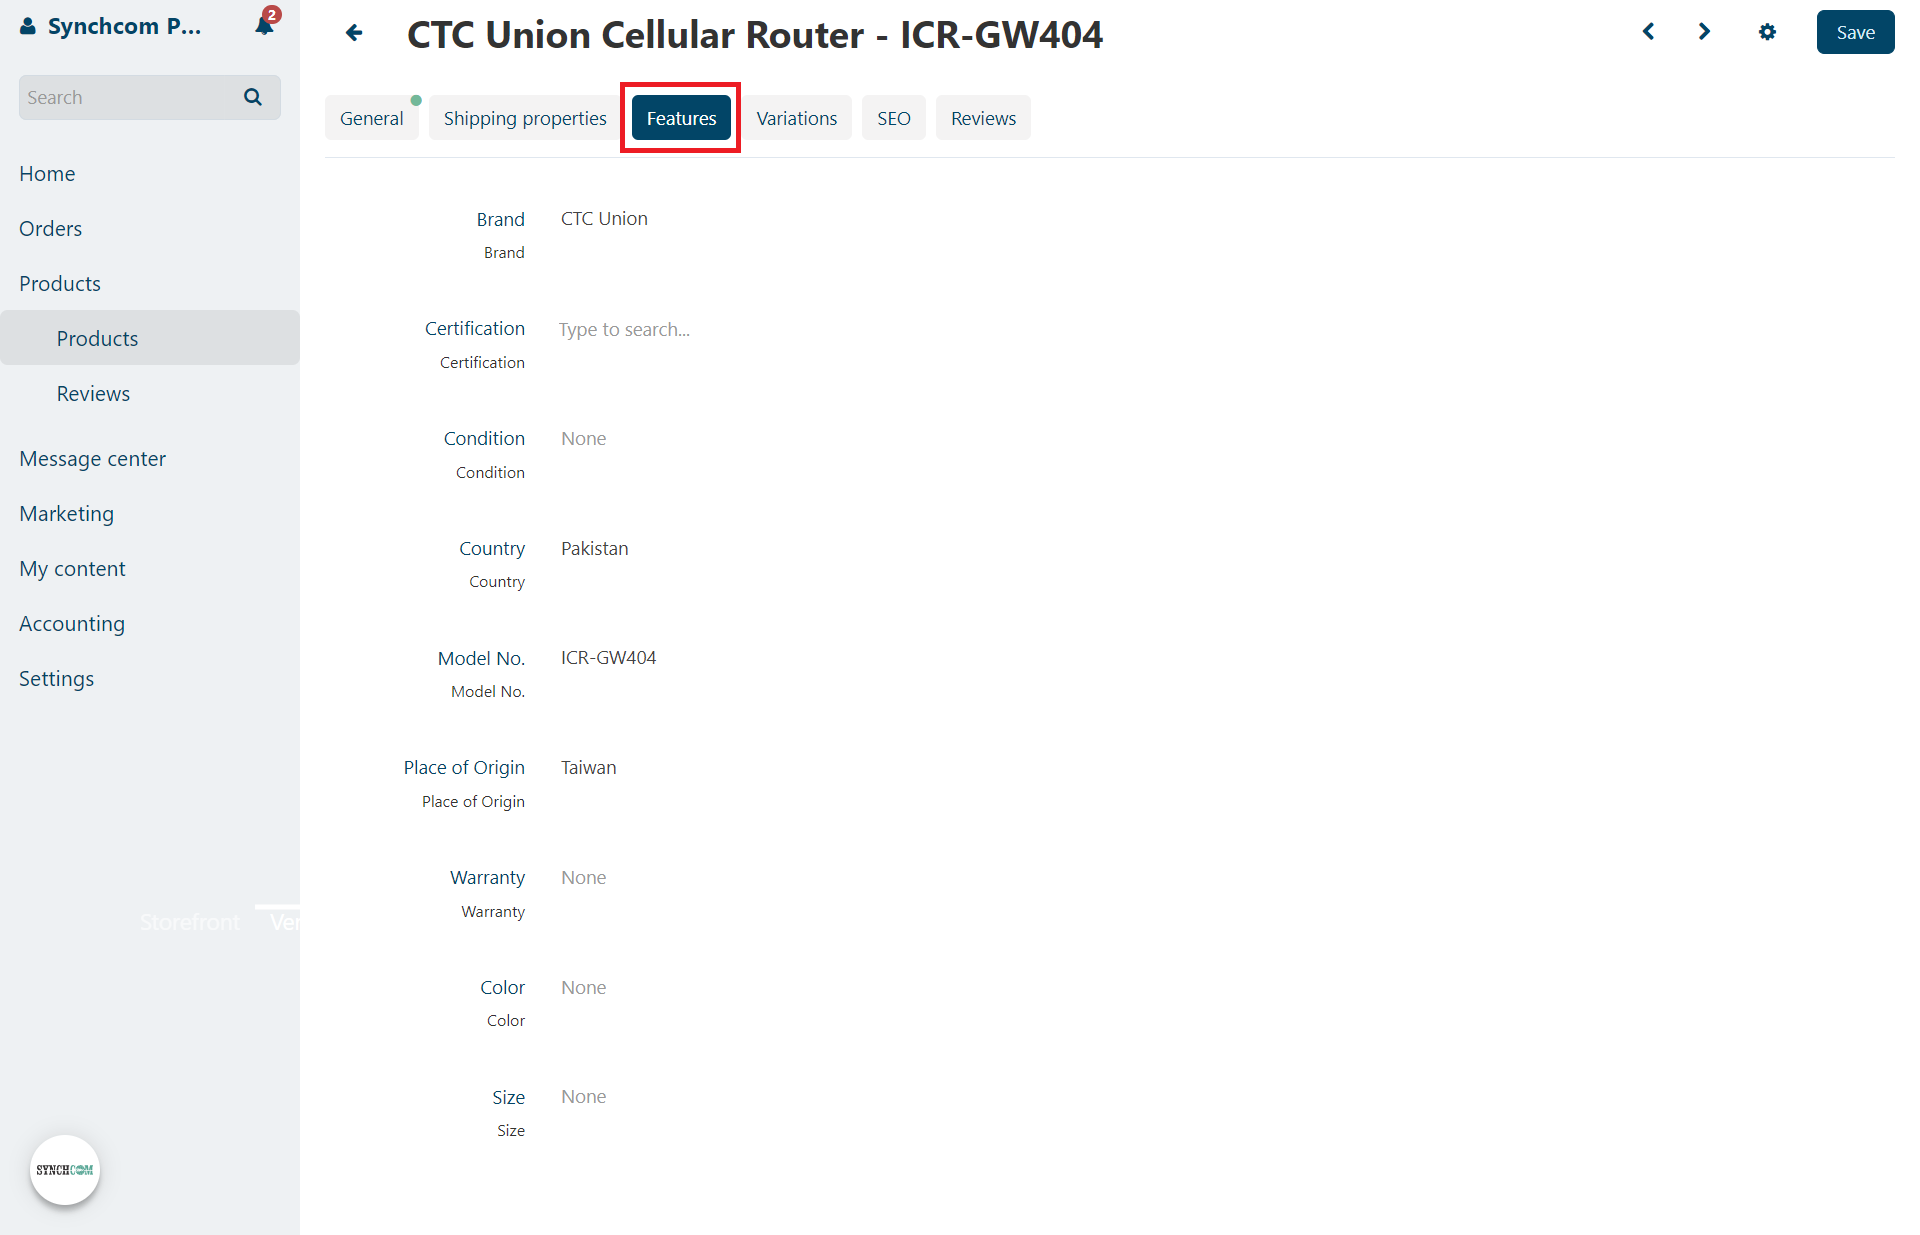
Features Tab:
- Add all relevant features for the product.
- Note: If there is any specific feature of a product that is not in a list then contact an admin team to sort this out for you.
Step 7:
Variations Tab:
- Once a vendor has selected the features, then add the variations of a product in the selected features.

Step 8:
SEO Tab:
1. SEO:
- SEO name—the value to which the standard URL will be changed.
2. Meta Data:
- Page title title—the title of the product page on the storefront, which is displayed in the web browser when somebody is viewing the page. If you don’t specify a value manually, it will be generated automatically.
- META description—a brief description of the product.
- META keywords—a list of search keywords that appear on the product page.

Step 9:
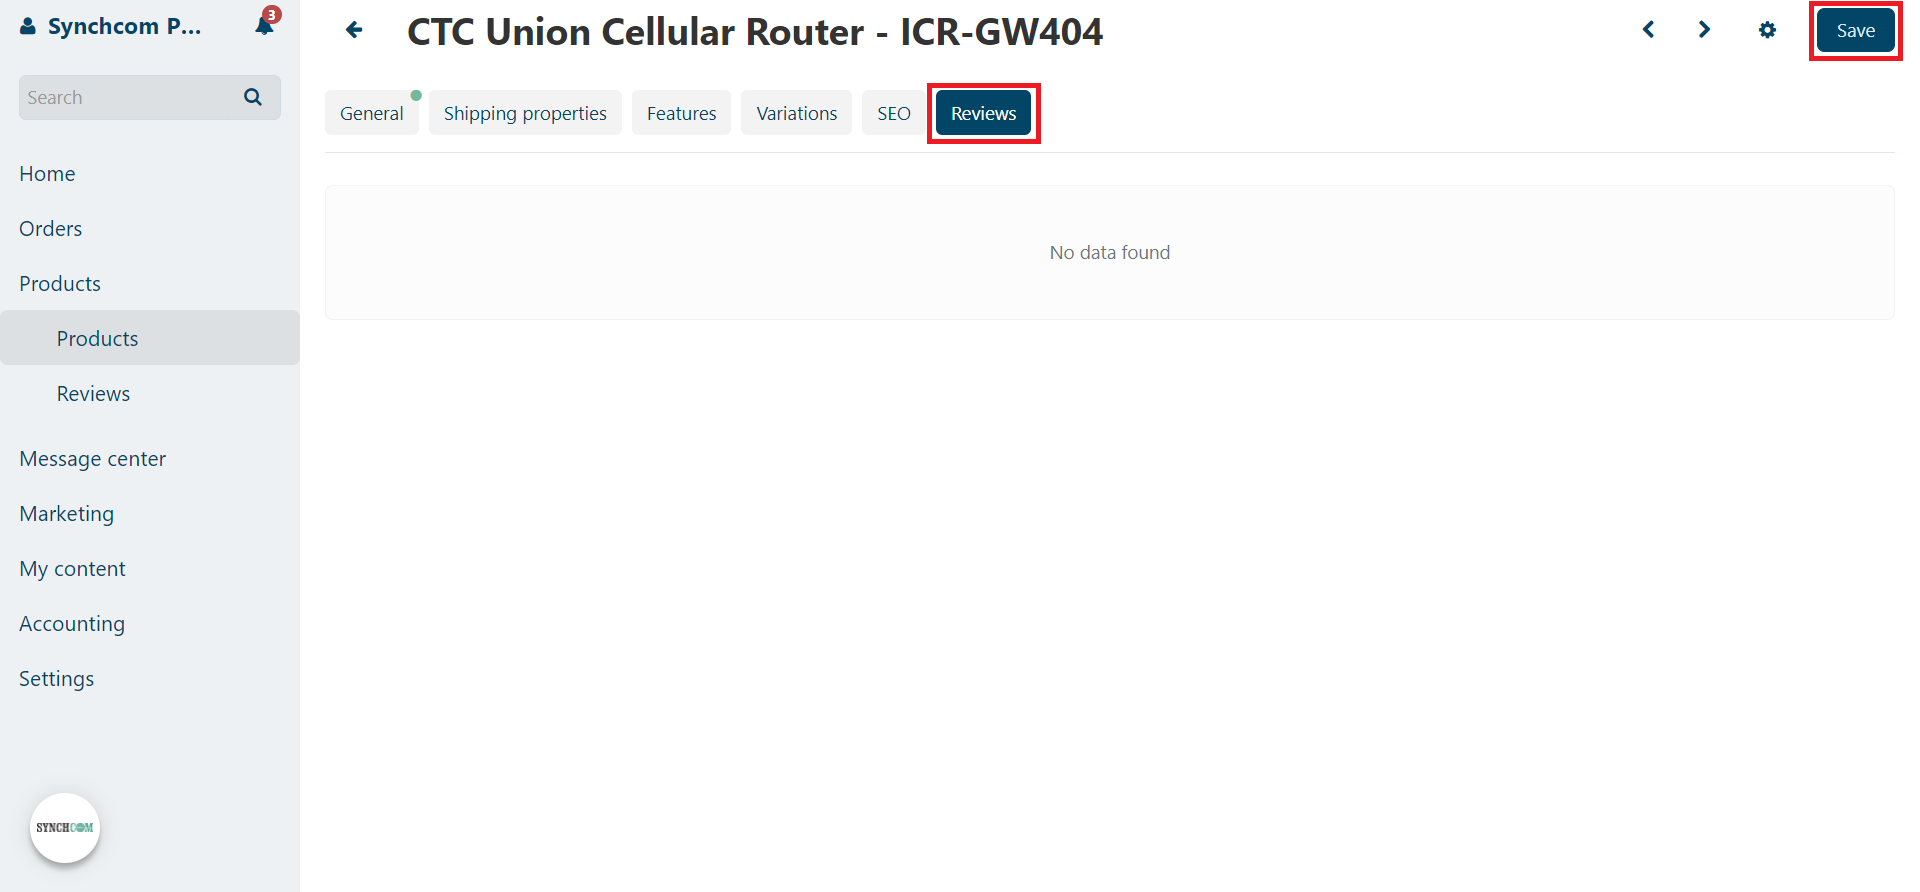
Reviews Tab:
- Here you can see reviews on this products.
- Once everything is set, then click on the "Save" button.
Step 10:
Products on Moderation:
- A vendor can check the status of the products in the "Products on moderation" tab.