Latest Blog Posts


Top rated

How to Manage Vendor Company Info?
Step 1:
Log in to your Trademart vendor account and open "Vendor Panel".

Step 2:
Click on your company Name, in the Vendor administration panel of your store → you can edit your Seller company info.

Step 3:
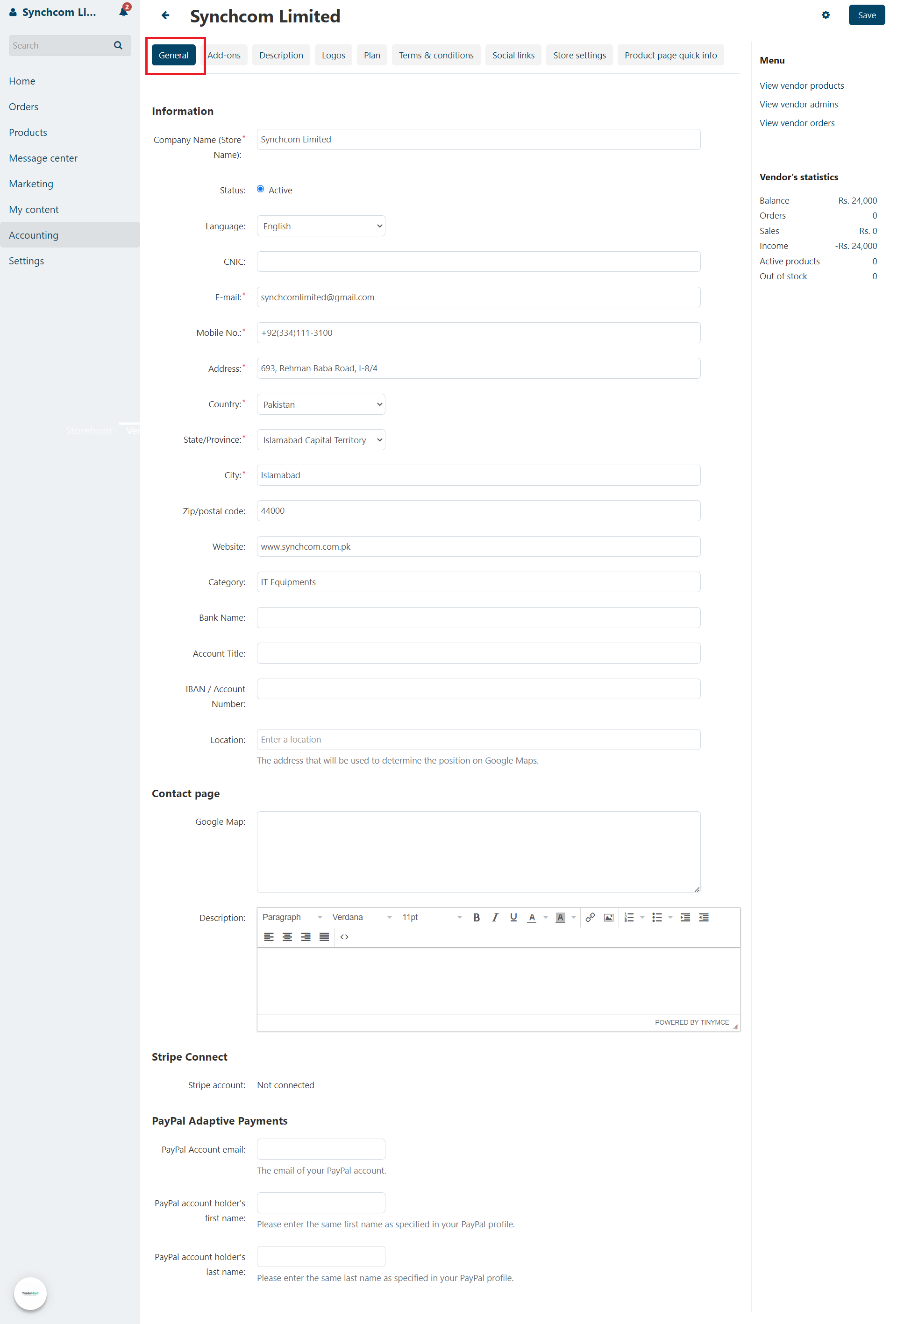
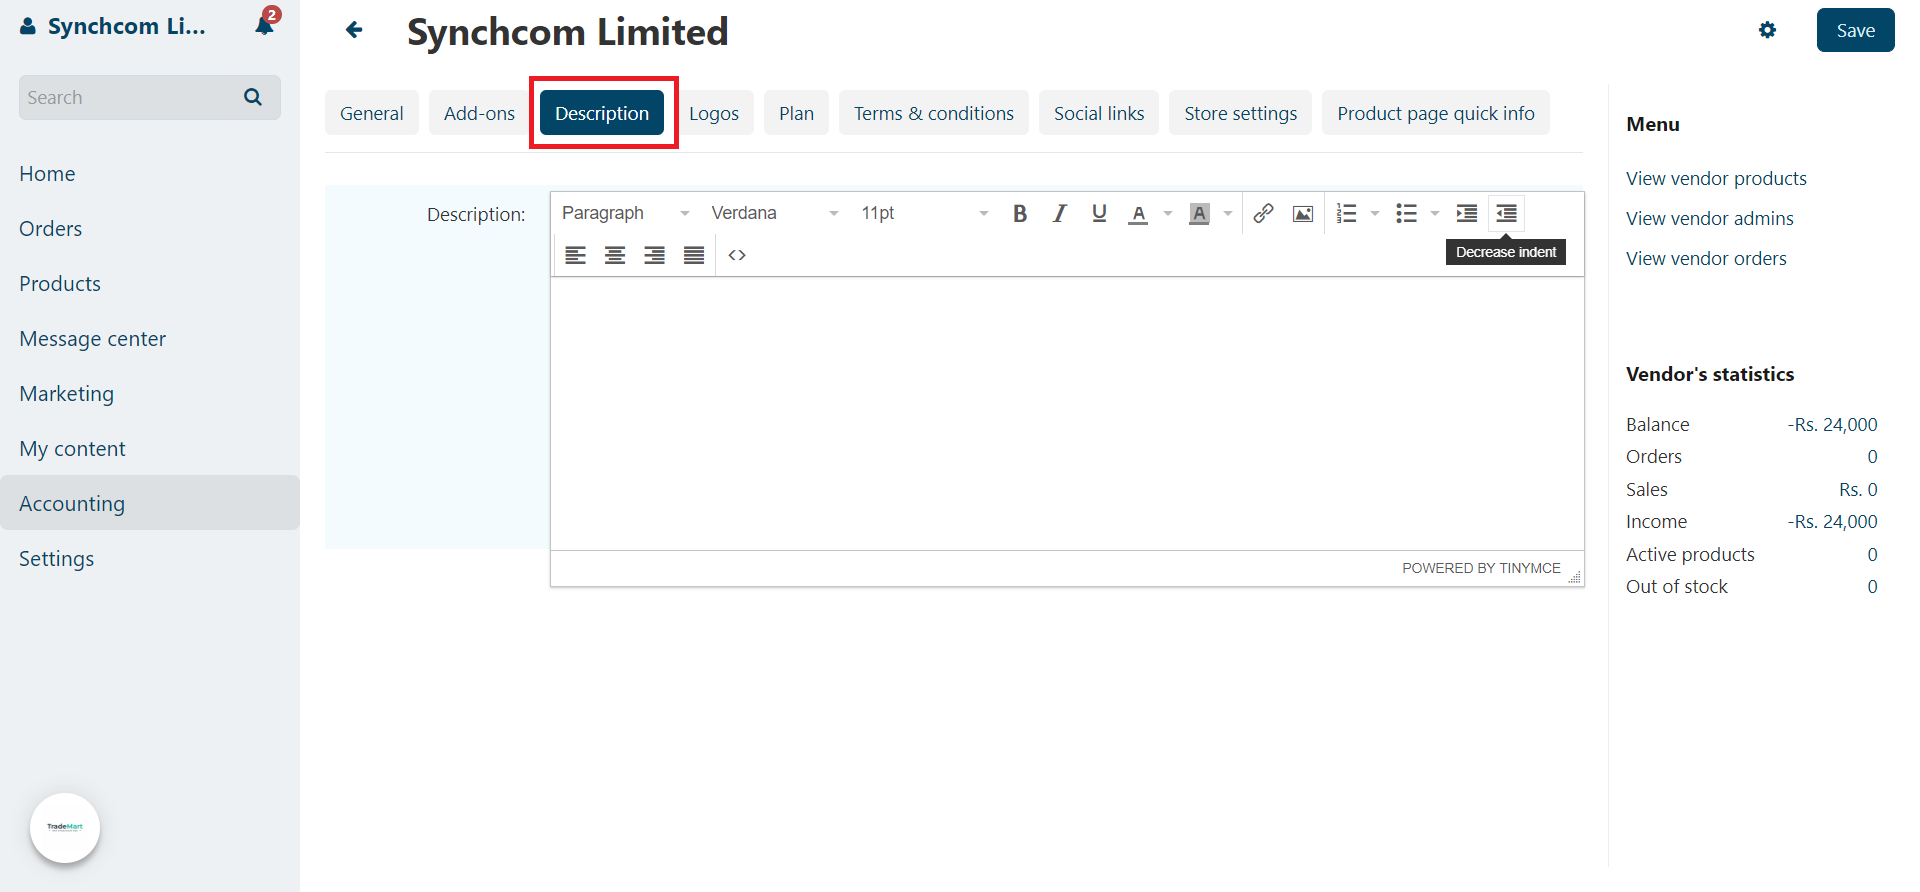
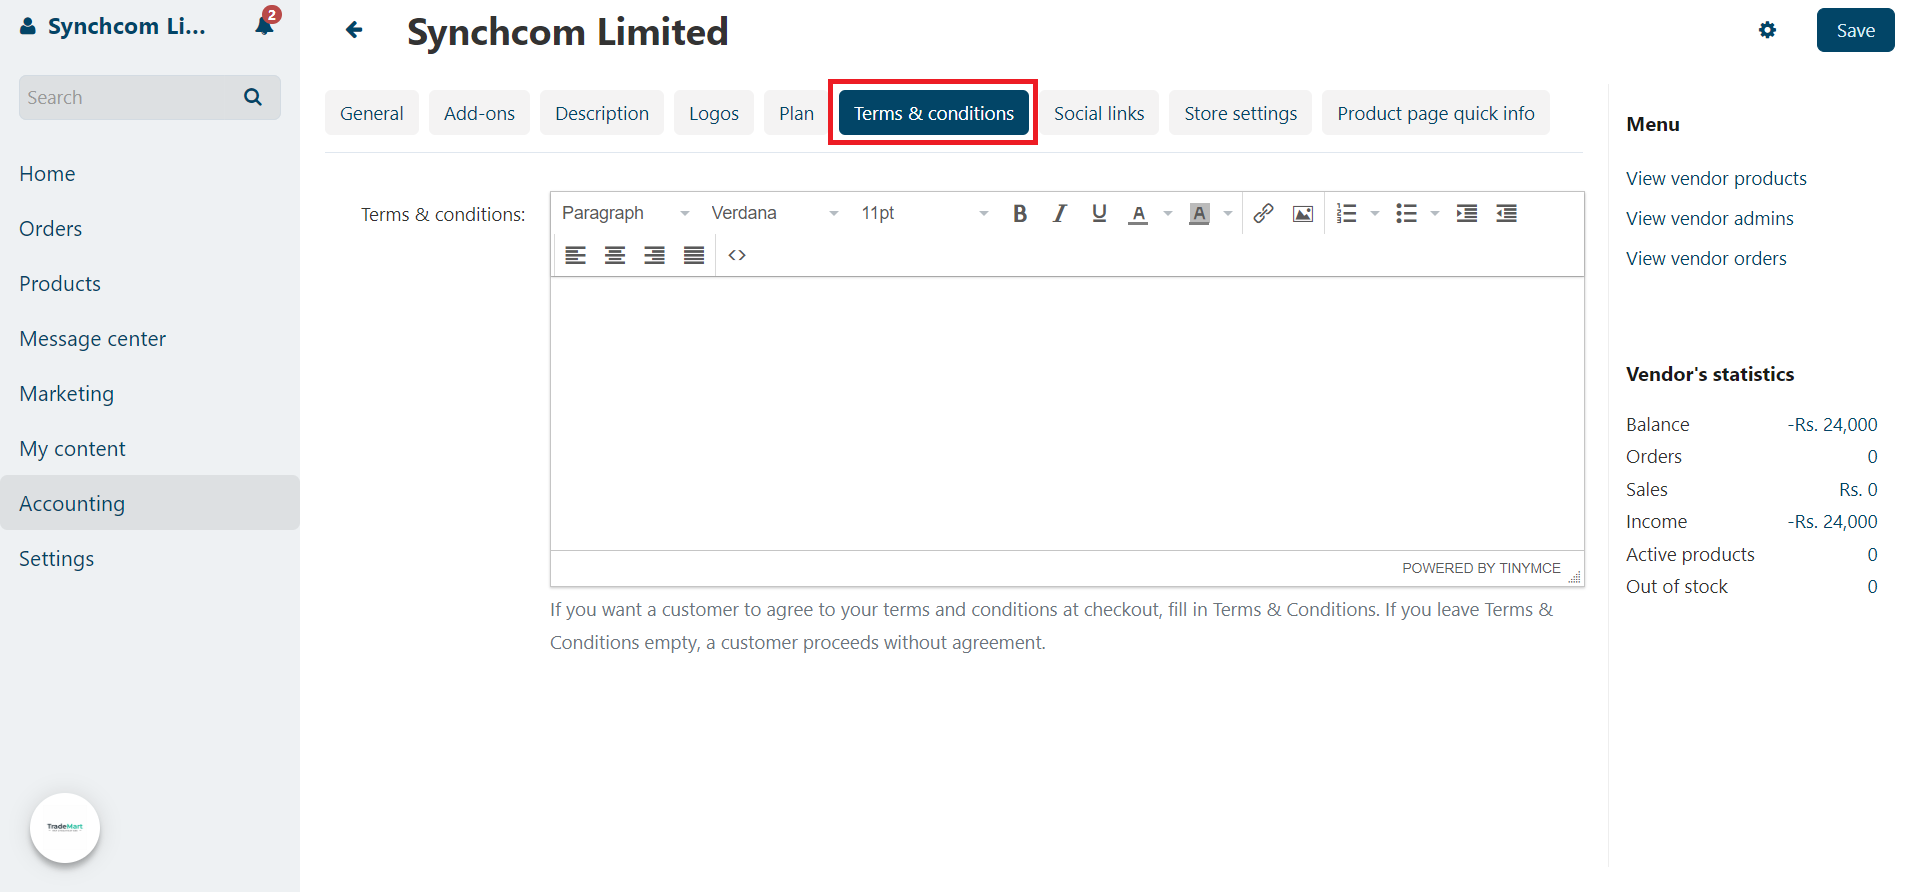
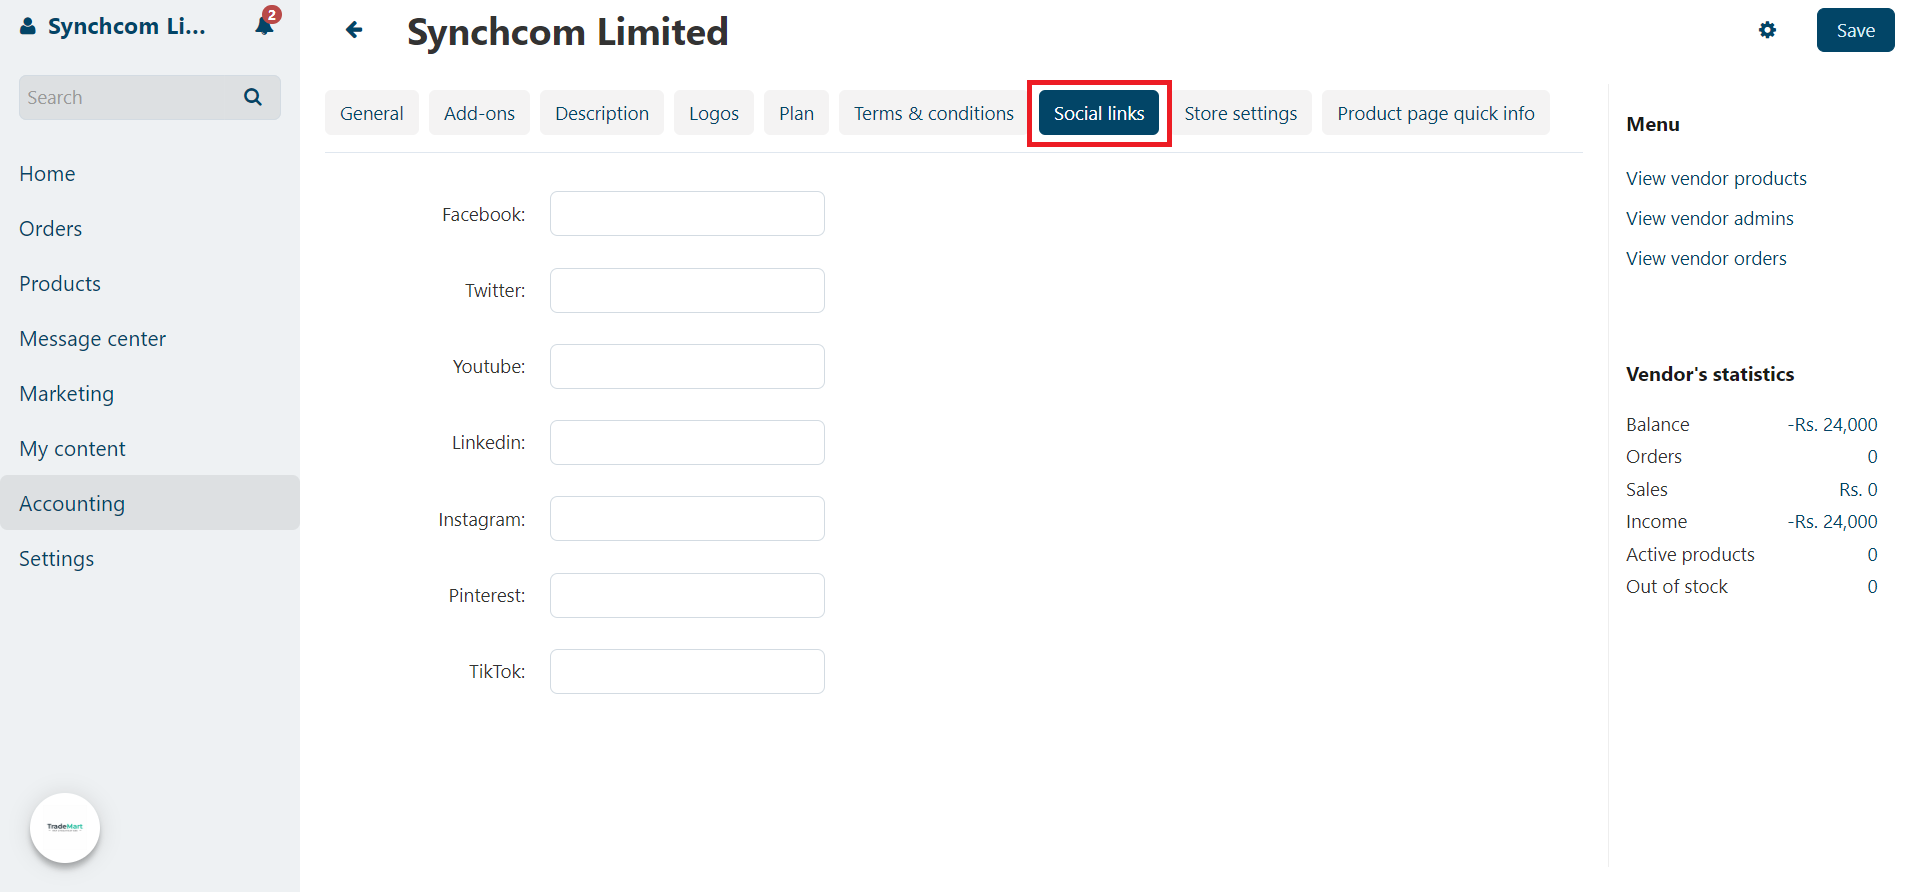
The Company info page will open. With different tabs just below the heading of "Your Company Name“, fill the required fields of the Company.
- General
- Add-ons
- Description
- Logos
- Plan
- Terms & Condition
- Social Links
- Store Setting
- Product Page Quick Info

Step 4:
General:
Add/Edit following Information in General Tab:
- General Information
- Contact information
Step 5:
Add-ons:
Add/Edit following Information in Add-ons Tab:
- SEO Name

Step 6:
Description:
Add/Edit following Information in Description Tab:
- Company Description
Step 7:
Logo:
Add/Edit following Information in Logo Tab:
- Company Logo

Step 8:
Plan:
Add/Edit following Information in Plan Tab:
- Plan Detail
- Change Plan

Step 9:
Terms & Conditions:
Add/Edit following Information in Terms & Conditions Tab:
- Company Terms & Conditions
Note: If you want a customer to agree to your terms and conditions at checkout, fill in Terms & Conditions. If you leave Terms & Conditions empty, a customer proceeds without agreement.
Step 10:
Social Links:
Add/Edit following Information in Social Links Tab:
- Company all social links detail
Step 11:
Store Setting:
Add/Edit following Information in Store Setting Tab:
- Header Colors
- Menu Colors
- Store Category Settings

Step 12:
Product Page Quick Info:
Add/Edit following Information in Product Page Quick Info Tab:
- Shipping Cost
- Payment Methods
- Why Us?

- Once everything is set, then click on the "Save" button.